Make milk foam like a barista
Perfect milk foam is what makes a cappuccino, latte macchiato or flat white really special. It should be creamy, fine-pored and stable in order to combine harmoniously with the espresso. But what is the best way to achieve it? Which milk is suitable for this and do you really need special barista milk? In this blog post you will find out everything you need to know about perfect milk foam for your coffee - from the right technique to the best milk alternatives.
- Milk frothing technology: differences between steam nozzle, electric milk frothers and manual methods.
- Which milk is best? Fat and protein content as decisive factors for foam formation.
- How to make firm milk foam: temperature, technique and avoid typical mistakes.
- Do you need barista milk? Advantages and disadvantages of special types of milk for milk foam.
- Which plant-based milks work well? Milk alternatives for lactose intolerance.
- Why does milk curdle in coffee? Acidity and temperature differences as causes.
1. Milk foam technology – What methods are there?
Milk foam can be created in several ways, and each method affects consistency and quality.
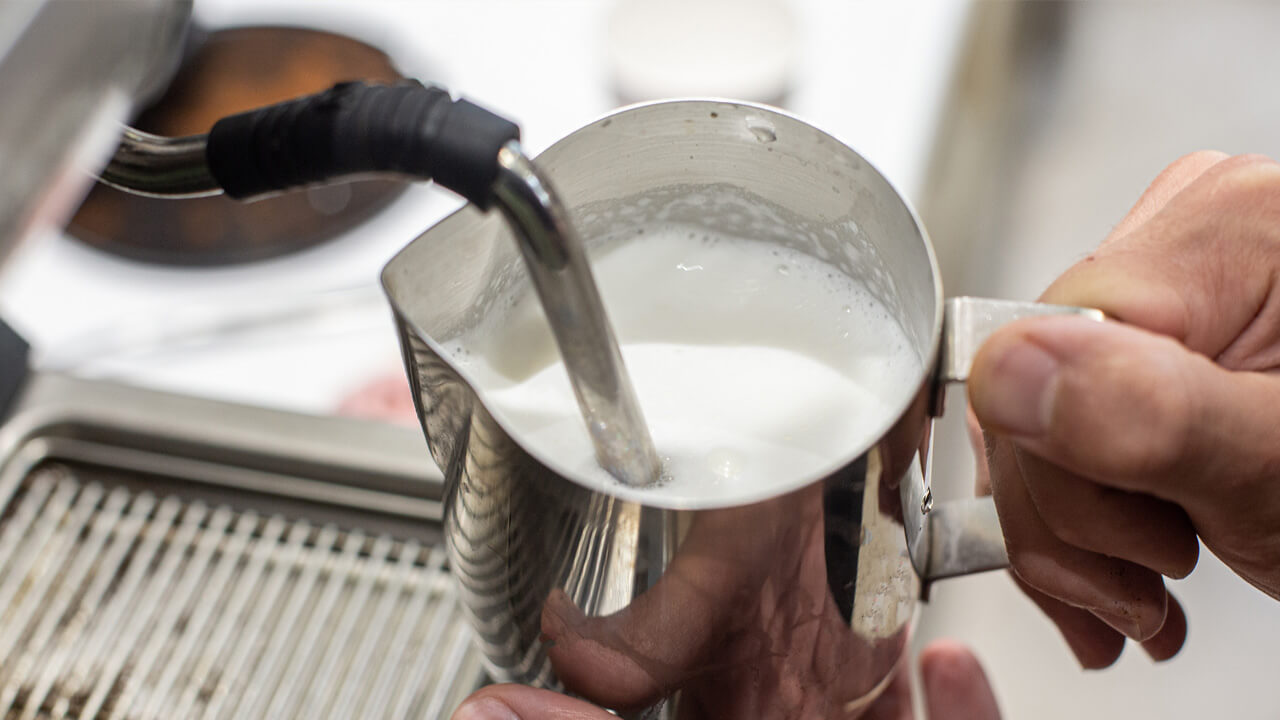
steam nozzle (espresso machine)
The classic method in cafés. A steam nozzle is used to incorporate air into the milk and heat it at the same time. It is important to hold the nozzle just below the surface to obtain fine, creamy foam.
Electric milk frothers
Practical for home use: These devices automatically froth the milk and heat it to the ideal temperature (approx. 60–65 °C). There are versions with a stirring mechanism or induction technology.
Hand frother (e.g. French press or whisk)
With a manual milk frother or a French press, a fine-pored foam can also be created by quickly pumping - but with a little more effort.
Barista tip:
If you value perfect foam, you should use a steam nozzle or a high-quality electric frother.
2. Which milk is best for milk foam?
Not all milk foams equally well. In addition to fat, the protein content is also important, as it ensures stability. It is not the fat but the protein content of the milk that is crucial: after all, when foaming, the air combines with the protein molecules and creates fine bubbles.
- Whole milk (3.5% fat or more) → Creamy, stable foam with a soft mouthfeel.
- Low-fat milk (1.5% fat) → Produces firmer foam, but less creamy.
- Skimmed milk (0.1% fat) → Lots of foam, but coarser-pored and less smooth.
What is homogenization? During homogenization, the fat globules contained in the milk are broken down under high pressure and thus evenly distributed throughout the milk.
What is pasteurization? Pasteurization kills microorganisms such as yeast or mold and makes them last longer. To do this, the milk is heated for a short time (a few seconds/minutes) to a core temperature of around 74 degrees.
Barista tip:
Long-life milk often foams a little better than fresh milk because the heating changes its structure and the foam is therefore more stable. Milk with at least 3.3% protein content usually produces the best milk foam.
The good foaming properties of, for example, the longer-lasting Hamfelder-Hof Bioland fresh milk (available in organic markets, REWE and Edeka, among others) can be attributed to the steam injection process. The milk is gently heated to 122 degrees for 1.8 seconds and then homogenized (ie the fat is distributed so finely that the milk no longer creates cream). This process ensures a longer shelf life while retaining most of the ingredients.

3. How to make firm, creamy milk foam
1. Observe the correct temperature
- Froth cold milk (approx. 4–8 °C).
- The ideal temperature for finished foam is 60–65 °C – hotter milk tastes burnt and loses stability.
2. Foaming technique
Steam nozzle (recommendation): Froth the milk with the jug slightly tilted, first hold the nozzle just below the surface, then immerse it deeper to swirl the milk. To start the rolling phase, immerse the steam nozzle deeper into the jug. The rolling phase serves to evenly distribute the foam previously created in the drawing phase throughout the milk jug. This will give you a creamy, homogeneous foam that combines perfectly with the coffee.
Milk frother: Use high-quality equipment to produce fine, stable foam.
French press or whisk: Pump or stir vigorously until creamy foam forms.
3. After frothing – tapping & swirling
After frothing, tap the jug lightly on the work surface to remove large air bubbles and swirl the milk to keep it smooth.
4. Do you really need barista milk?
Barista milk is specially optimized for frothing. It often contains a higher protein content or additional stabilizers that ensure particularly creamy and stable foam.
Benefits of Barista Milk:
- Foams particularly stable and fine-pored.
- Also works better with plant-based alternatives (e.g. barista oat milk).
Disadvantages:
- Often more expensive than regular milk.
- Sometimes contain additives that not everyone likes.
Barista tip:
If you often make milk foam and value the perfect consistency, you can try barista milk - but it is not necessary.
5. Milk alternatives for lactose intolerance – which ones foam well?
Many plant-based milks have different protein and fat ratios than cow's milk, which makes frothing difficult. However, some work particularly well:
- Oat milk (barista edition) → Very creamy, almost like cow's milk.
- Soy milk → Foams well, but can quickly become unstable.
- Almond milk → Light foam, but often more watery.
- Coconut milk → Hardly works for frothing.
Barista tip:
Plant-based “barista” variants are specially developed for better foam and often contain additional proteins or stabilizers.
6. Why does milk curdle in coffee?
Coagulation means that the dissolved proteins in the milk lose their solubility and as a result clump together. There are two main reasons why milk in coffee coagulates:
1. Acidity of the coffee
- Particularly light roasts or highly acidic coffees (e.g. African beans) can cause milk to curdle.
- Solution: Choose milder beans or a darker roast.
2. Temperature differences
- If the milk is too cold and poured into very hot coffee, it may curdle.
- Solution: Heat milk to about 60 °C before mixing it with coffee.
Barista tip:
To prevent curdling, the milk should be taken out of the refrigerator well before use. Fresh milk is less likely to curdle than older milk, as the pH value changes slightly during longer storage.
Conclusion – How to get the perfect milk foam
With the right technique, the right milk and a little practice, perfect milk foam is easy to achieve. Whether you use cow's milk or plant-based alternatives - the temperature, protein content and even air distribution are important. If you want to enjoy creamy, stable milk foam for your coffee, you should pay attention to the small details.